Table of Contents
Why install an electric octopus wiring ?
The advantages of the octopus wiring
The electrical octopus considerably simplifies the installation of the electrical network in a new building or an electrical renovation project. Among its many advantages, the electric octopus wiring is cheaper and quicker to install than a conventional system. The octopus wiring is designed in advance, and the materials needed for installation are generally supplied in the kit. All you have to do is put it down. An electrical octopus can save up to 50% compared with a conventional electrical installation.
Operating principle
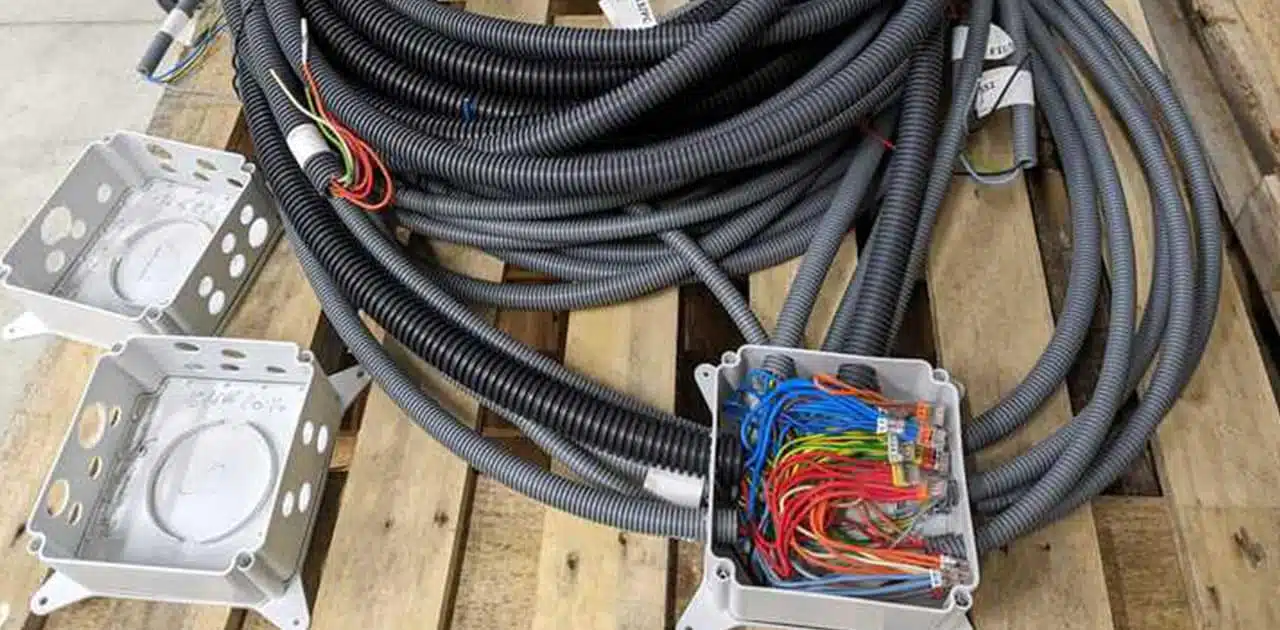
The electrical octopus, also known asthe “electrical spider“, is based on the electrical installation or construction plan for your home. It consists of a junction box, called a ” centre point ” box, from which electrical wires run. These ICTA-sheathed cables are used to supply power and lighting to the rooms in the home. A duct runs from the centre point directly to the switchboard. Each sheath is identified by a label whose marking indicates which element it is intended for, i.e. :
- P for plug,
- L for lamp,
- I for switch.
You can find this marker on the electrical installation plan provided.
Before installing an electric octopus wiring
Prepare the necessary equipment
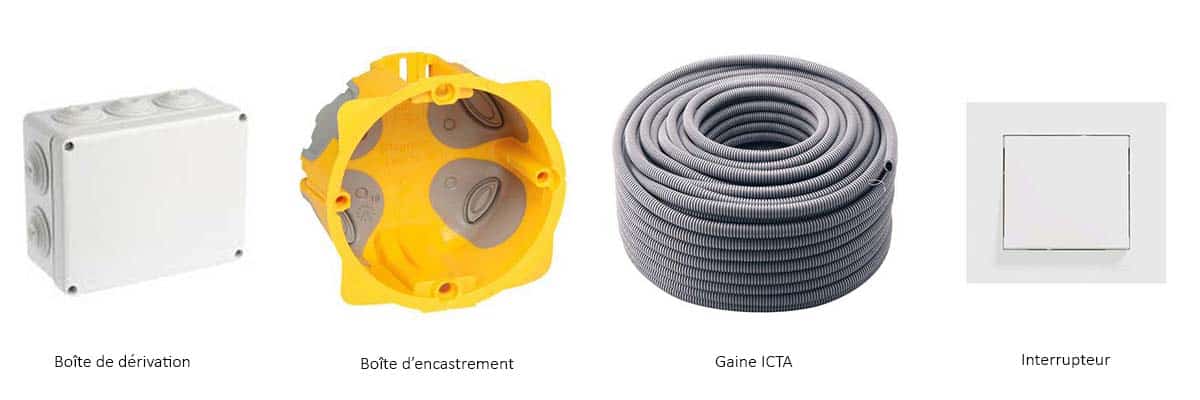
Before installing the electric octopus wiring, you need to prepare the necessary equipment. You’ll need flush-mounted boxes for cable outlets, and fittings such as sockets, switches and light fittings. The flush-mounted box, like the DCL box, is used to fix a device to the wall and ensure the safety of the electrical installation. Electric spiders wiring are generally delivered in ready-to-install kits. All the equipment needed to install the electrical octopus wiring, flush-mounted boxes, sockets and DCL boxes is included in the kit. You will also need the electrical octopus wiring layout plan and the installation guide to complete your installation. You also need an electrical panel. Most octopus wiring manufacturers supply an electrical kit so that you can carry out your installation work. Finally, take a few DIY tools such as a screwdriver, a pencil and wire strippers. As with all electrical work, remember to switch off the power supply before carrying out any work, to avoid the risk of electrocution or fire.
How do I install an electric octopus wiring? 6 steps to follow
Step 1: Deploy the electric octopus wiring
To better visualize the electrical octopus and facilitate its installation in false ceilings, attics or hollow-core floors, start by laying it out on the ground. Next, you need to distribute and orientate each ICTA duct according to the equipment to be supplied. To do this, use the electrical installation plan and the labels on the ducts. Each sheath is labelled to indicate which element it supplies. These markings show you where to connect the electrical conduit. Finally, position the center of the octopus where indicated on the plan, and secure it in place. 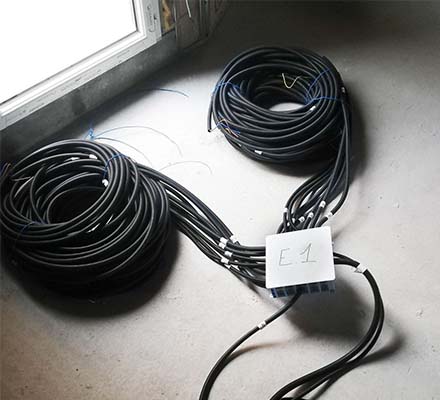
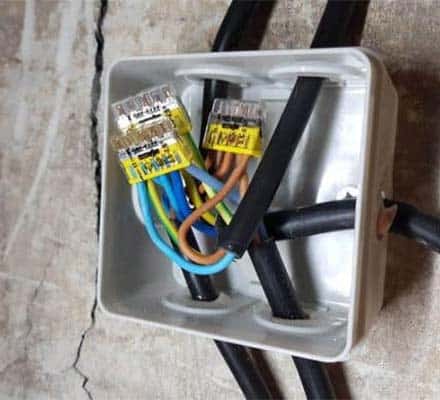
Step 2: Attach the junction box
The second step is to attach the junction boxes (sometimes called“junction box” or “connection box“). Using a screwdriver and wire strippers, connect the wires coming out of the sheath to each box. Be careful to respect the colour codes of theelectrical wires to avoid the risk of electrocution.
Step 3: Running ducts through ceilings and partitions
After fixing the centre of the octopus wiring to the ceiling, run the electrical conduits, one by one, through your ceilings or partitions to the terminations where they will feed the fittings. The same sheath can contain several electrical wires to supply different devices. If this is the case, cut the sheath and take out the electrical wires intended to supply the flush-mounted box. Be careful not to cut or damage the wires when removing them from the sheath.
One of the octopus wiring ducts is designed for connection to the electrical panel. It should be noted that electrical octopuses can be placed in various building voids, false ceilings or lost parts of a crawl space. This means you can plug a junction box into the centre to connect a light fitting, for example. Once the plasterer has finished the false ceiling, you can place the finishing cover and hang the luminaire from it. If necessary, you can intervene on the center point box. 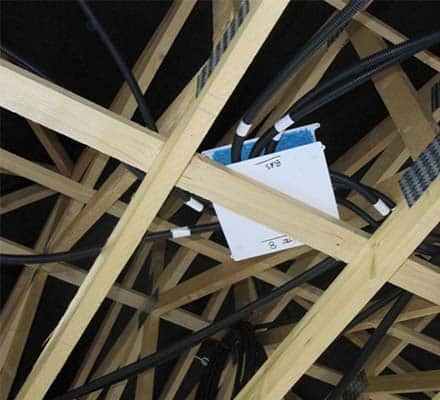
Step 4: Wiring the electrical equipment
You can now wire up your electrical equipment: sockets, lighting points, etc.
To find out the drilling height for your electrical appliances, refer to the installation plan supplied by the installer or electrical contractor.
Please note that the installation of the electric octopus wiring must comply with current standards.
Standard NFC 15-100 regulates low-voltage electrical installations and specifies the height of flush-mounted boxes:
- Switches should be fitted at a height of between 90 and 130 cm.
- The axis of the 16 A sockets should be between 5 and 130 cm from the floor.
- For 32 A sockets, the minimum height from the floor is 12 cm.
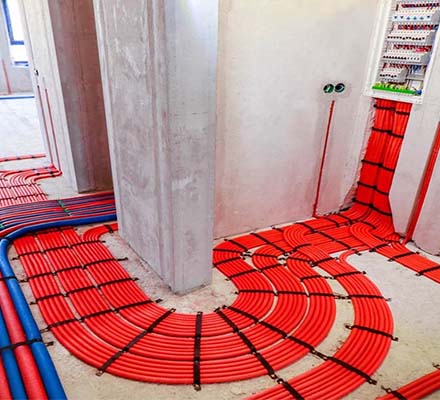
Step 5: Connect to the electrical panel
At this stage, your electrical renovation work is almost complete. You now need to connect the octopus wiring to the electrical panel so that it can distribute electricity throughout your home. The electrical panel is usually already installed in a housing service duct (GTL). The box can be pre-equipped or pre-wired. 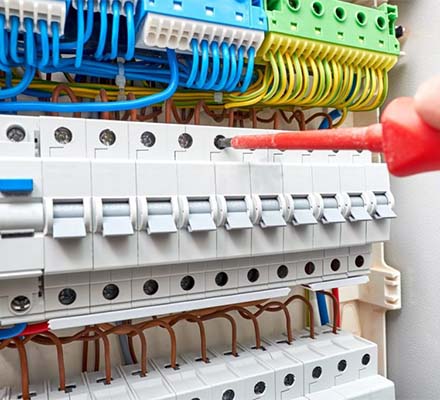
Step 6: Pass the Consuel
Consuel certification is essential to ensure that the electrical installation complies with standards. Go to the Consuel website and obtain the“yellow” Attestation of conformity for dwellings or similar. An appointment will then be made to check the conformity of your electrical installation. 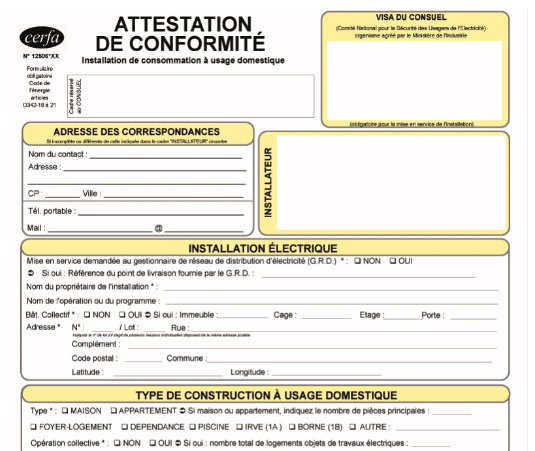
Electrical installation work is not the easiest of tasks. Of course, you can install the electric octopus wiring yourself, but you can also call in a professional who will guide you through all the phases of your project. The prefabrication of electrical octopuses wiring is an essential solution for building professionals, electricians and octopus wiring manufacturers. To make an octopus wiring, they use sheath pre-wiring machines that optimise the passage of wires through the sheaths. The industrial threading machine eliminates the need for time-consuming steps such as pulling the wires by hand into the sheaths.